Welcome to Bonsai Direct! Please use the tabs below to find loads of info and answers to any questions or concerns you may have.
If you can’t find the answer to your question, please use the form on the relevant tab to contact us.
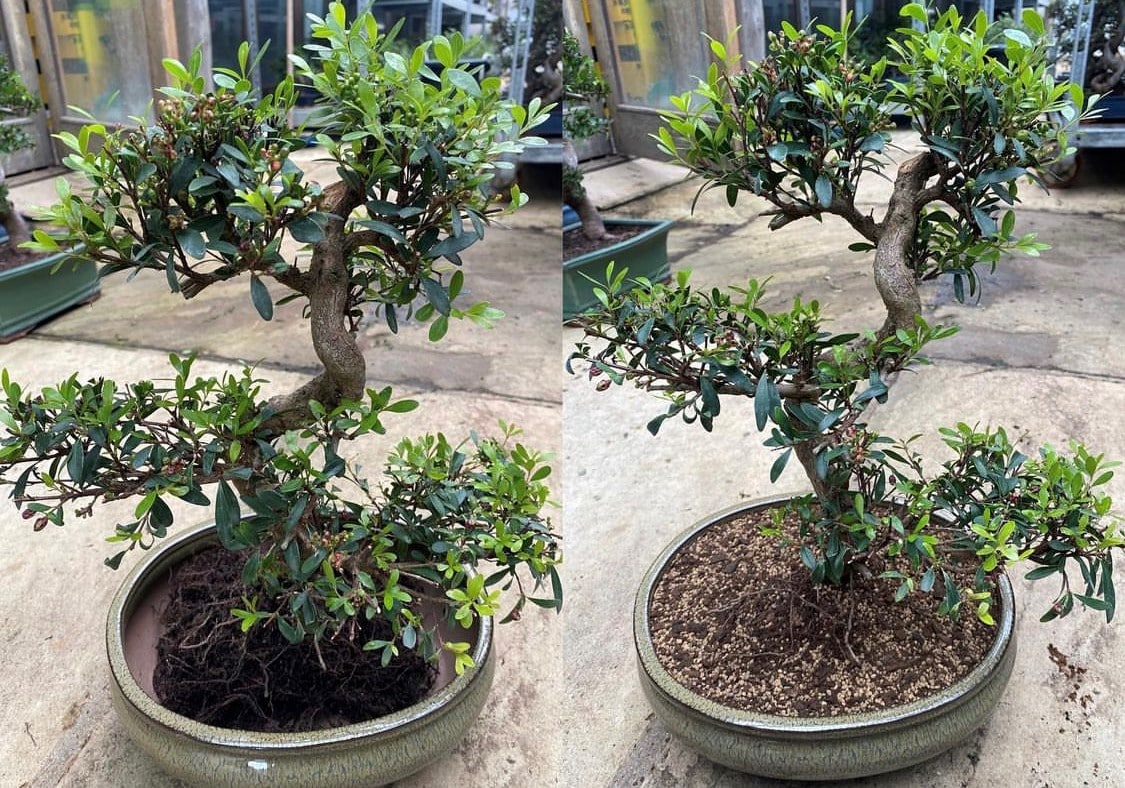
How do I repot my bonsai tree?
“How to repot my bonsai tree?” is a very common question we are asked. Repotting is an essential part of caring for a bonsai. All bonsai will need repotting every 1 – 5 years, to keep the bonsai healthy. Please watch the video with bonsai expert Lloyd Noall below on how to repot your bonsai:
Transcription of the Potting Tutorial
“So we’ve done some pruning and we’ve done some wiring and now we’re going to do some potting. So you’ve got your repotting guide here, all right, step by step just like the other processes, so have a look through that and you’ll know what we’re in for. What I’m going to do now is I’m going to take the tree out of its pot, and for that, I need a spatula. All right, root, rake and spatula all in one. First of all, we’re going to do the we’re going to use the spatula bit and we’re going to lift it out of the pot.”
“All I’m going to do first of all is gently just sort of work my way around the outside of the root ball, like this. So we’re just separating the soil from the pot, okay? Just get in there. And now, hopefully, what we can do is we can just sort of try to work the spatula underneath the root ball and just very carefully. Oh, there we go, look at that. I’ll just give them a little shake there. We’ll make a bit of a mess, but not to worry. I’ll just take that one and I’ll put the old pop down there, get that out of the way.”
“This one’s actually very easy”
“Now, next we’re going to need a chopstick. Handy little tool, I use this for all different things, but mainly for doing this. What I’m going to do now is I’m just going to go around and I’m going to tease away, I want to reveal I mean, this is not too bad actually, but sometimes you get your bonsai and the soil is right up here and it’s covering any nice roots, trunk flare or anything like that. This one actually has already been done for us, but sometimes it’s all covered up.”
“We’re just going to tease around there, clean up there just very gently. Sometimes you can repot a bonsai and it’s the root ball is absolutely solid. Takes ages. This one’s actually very easy. These were probably root pruned about a year ago I should think so it’s nice and easy and it’ll clean up just there. You never know. We might find some more roots in there and it just gives it a little bit of character around the start of the bonsai.”
“It’s been a long time since I combed my hair”
“We don’t want to take out too much soil. Sometimes if they’re really stubborn we can just get the rake. Look at that. You see, it’s just like combing your hair. Okay, it’s a long time since I’ve combed my hair, I have to admit. But I used to, I can remember what it was like. We’ve got some straggly roots, not bad, a little bit of a lump here. I might just sort of see what it’s like there, just to break him out.”
“Okay, now, this type of bonsai, the Chinese elm, is fantastic for repotting. You can take off a fair amount of root, but as a general rule, when you’re repotting, only take off a third. All right, so you’re leaving two thirds of the root ball and removing about a third.”
“There we go, I’ll just have a look in there, see if there’s anything else. A bit of root coming down there, so it’s not bad at all. There we go, so that was actually nice and easy. I like it when they’re easy, sometimes it can take me all day just to get to this stage. Some of the bigger bonsai roots are quite solid and it takes a long time to actually ease it out of the pot. So it can take a few hours just to get to this stage, but for this purpose, that’s brilliant.”
“I always keep a pair of these big chunkies”
“So what I’m going to do now is I’m going to trim back the roots. And for these, we’ve got these nice big chunky root shears. You can see that’s solid. Nice and thick here. I always just keep a pair of these big chunkies just for pruning the roots. There we go. Well, that was quick. So what we’ll do now is have a tidy up and then we’ll get the pot ready.”
“Right, so I’ve had a quick clear up and now I’ve got this nice neat root ball ready for a new pot. So let’s pop him in. I have got a nice bonsai pot here, so I’m just going to sit him in there and see what he looks like. He looks good at the moment, the pot looks a little bit big, a little bit bright but don’t forget that the bonsai is going to grow. It’s going to fill out and it’s going to look a lot more thicker and fuller, so I think then the pot will be just right. But what I’ll do is I’ll show you a couple of other pots that I’ve got here, because it does make a lot of difference.”
“So an oval pot, let’s put them into there, let’s be just off centre a little bit. I know he’s probably not quite balanced, probably leaning a little bit, but just for purposes of looking at a different pot. So that one and cream pot makes it look a lot different, doesn’t it? Great. But I’m going to stick with my blue pot. Let’s stick it back in there. I think in a few weeks, especially in a few months, new leaves will be coming out making nice thick foliage pads. It’s going to look good! So what we need to do now?”
“We don’t want rotten roots, right?”
“We’ll just put the tree to one side, let’s just shake out the soil there so I can show you. Now, you’ll notice in the bottom of the pot here, we’ve got two nice big drainage holes. The last thing you want to do is to have a waterlogged bonsai, because if your water sits in there and it can’t run out, then the roots can start to rot. And we don’t want rotten roots, right? So we need a couple of little pieces of mesh there, one for each hole, and that will stop the soil from falling out of the holes.”
“We are going to need some wire. Now watch closely, what we’re going to do is we are going to make a little clip just to hold the mesh in position so that when we’re moving the tree around, the mesh doesn’t slide over, and then all the soil is going to fall out. So what we’re going to do here is we are going to just bend that around there like that, hen we’re going to go back the opposite way, and we’ve got that nice little s-shape there. Can you see that? And then what we’re going to do, we’re going to just snip that off with some snips here.”
“Now we are going to bend the legs down and this makes a neat little clip. Can you see that? Let’s see if that’s better, how’s that? We need another one of those. One for each hole, obviously, bend it around back the other way. Okay, snip them off and bend down the legs.”
“What we need now is the pot.”
“What you need now is the pot. Ideally, if you get it right, the legs will be just the right size to fit through the holes. I’ll put that in and then I’ll just show you. It takes a bit of practice, I have done thousands of these, but at the end of the day, all you need is a little clip in there to stop the mesh from sliding around. Now, what we do now is we turn it over and we just bend those over there. Look at that, that’s great, okay job done, mesh in.”
“Next, we need a bit of wire to go through the pot and this we call the anchor wire. What we’re going to do is we’re going to just tie the tree into the pot. So we are going to put this through here and it goes through the inside of the hole. Poke it through there and then I just bend that over there that holds that there and some up the other side. Snip that bit off and then pull that through. Push it down so it’s nice and tight, pull that bit up and bring him over. Okay, now that’ll just sit there for a little bit.”
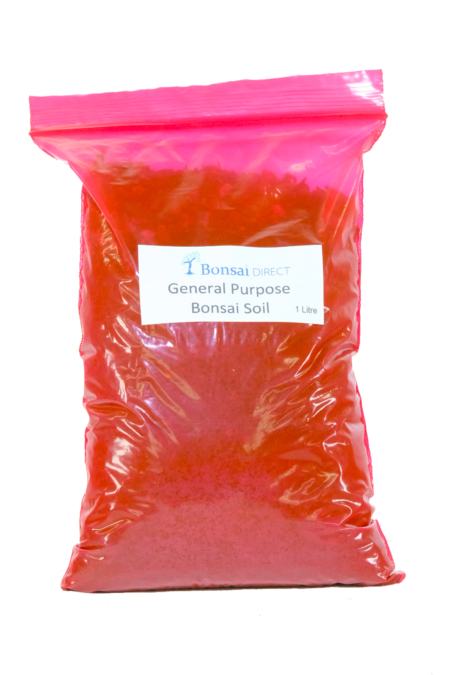
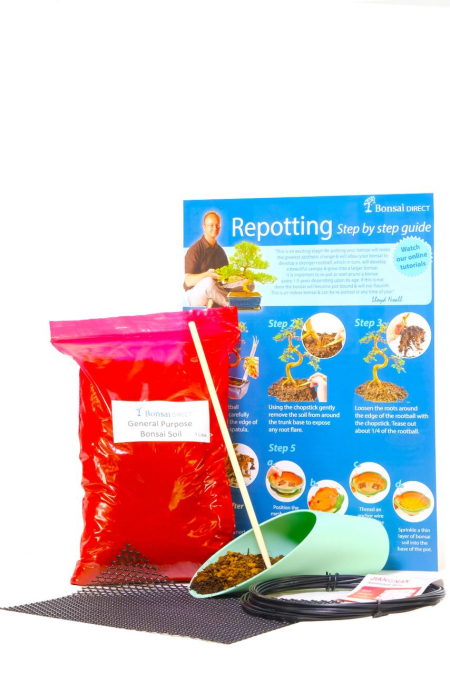
“The next thing we need to do is put a little bit of soil in the bottom of the pot. Now, here I have a bag of soil and my trusty soil scoop, these are fantastic for potting soil and I will show you why if I can get this bag open. There we go, soil scoop in there, look at that, nice and neat and then we can just put that in there. You don’t want too much, just a little bit for now to cover the bottom of the pot.”
This is a Japanese soil and it’s called Akadama”
“Now you’ve probably noticed that this soil is quite granular, lots of little balls, this is a Japanese soil and it’s called akadama. Brilliant for drainage, you can see that the water will just run straight through there. All it is, is little balls of dried loam, quite hard, but I can squish it so they will soak up the water, they will stay nice and firm. Any excess water just runs down through the grains and out through those great big holes at the bottom, into the tray underneath.”
“I’m going to put my tray in because what I’m going to check now is that the height is right. I want the start of my bonsai to be just level with or just a little bit up from the top of the pot, I don’t want it down too low. I don’t want it ideally beneath the rim of the pot. Okay, so that actually is sitting about right. Obviously that’s sitting a bit low, we can put some more soil underneath that and pop him up a little bit. That’s about right, that height there I’m quite happy with that.”
“Things can look a bit too even”
“The next thing we need to do is to make sure that it’s sitting in the pot in the right place. Now, I will move him around a little bit, and hopefully you will be able to see what I mean by in the right place, because obviously we don’t want him over there because he’s going to be off balance. Do we want him right over this side? No, it’s actually not too bad over there because this branch is covering this space here. I’ll move that bag out of the way and you can see the whole pot there. If we put him in dead centre, things can look a bit too even. This branch starts to come out over there a little bit. If I put in too far back, we’ve got too much foreground, too much background.”
“Now I’m obviously looking from the back of the tree. This is the viewing side here, because we can see all of the trunk here, and I’m just going to spin it around so that I can take a look, and you can have a look at the back of the tree. And I am going to put him.. about there. Right. In fact, not about there. I’m going to put it right there, just like that. The top of the tree which is up here, I want it to be right over the start of the tree or thereabouts, so that it’s not leaning over, not leaning forward or backwards. I want it to look balanced.”
“Keep looking at him”
“I’ll just spin him around again and have a look, take your time and you’ve got to just keep looking at him. Give him a little bit of a bit of a tweak here and there and sometimes he might just keep flopping back over until we get the rest of the soil in so don’t worry about it too much. What I’m going to do now, I am just going to pass the wire over. I’ve got a big root here, which makes it nice and firm, so I’m just going to pass them over there and just tie him off a little bit.”
“What I’m going to do now, if they’re not in my way, I’m just going to trim back those ends there so that’ll hold it a little bit, but it’s not going to be firm. What I’m going to do now is work some more soil in. I’m going to place lots of soil in there and what I tend to do is just to place it right around the trunk there, and it seems to roll down quite nicely into the pot. There we go. I get a good bit in there, all the way around, probably enough just to sort of get the soil up to about halfway up the inside of the pot, because now what we want to do is work the soil in around the root ball.”
“You’re going to think I’m mad”
“At the moment it’s quite wobbly because he hasn’t got any soil really wrapping around his root ball, so what I’m going to do is I’m going to use my chopstick, and I’m going to just carefully work the soil in. What I tend to do is put my fingertips on top of the soil, right, place it on there and then I work the chopstick around my fingertips like that and I can feel the soil. Obviously at the moment I can see it all going, it’s just disappearing so I’m working it down. I’m not ramming it in there, I’m not trying to pack it in there, just doing it softly.”
“I always think this bit is a bit like standing on the beach in your bare feet, just on the edge of the water, and the waves come in around your toes and you just wiggle your toes and the sand falls away from under your feet there. If you’ve never done it, you’re going to think I’m mad. But if you have done it, it’s that kind of feeling, you can just feel it. Feel the soil just falling away from your fingertips and as soon as it stops falling away, you know that that bit’s done. Right, so firming up, good job. Bit more soil, shake it down there. That’s good, we’ll do a bit more working in with the chopstick. I just work my way around like that, just feeling with my fingers to see if there’s any pockets under there, little air pockets.”
“Got bits of soil everywhere”
“All right. How are we doing? Pretty good, pretty good. Right, a little bit more soil around here. We’re getting there now. The right end of the chopstick, one dirty end and one clean end. Tree is quite firm now, that looks good, nice and firm.. that’s really good. Now what I’m going to do is I’m going to just tighten up the wire here and I’ll probably just have a little bit of a clean up at the same time. Got bits of soil everywhere and then we’ll do the next bit.”
“I’ve had a little clean up now and looking at the tree looks good. We’ve got a couple of other little things to do now. We’ve got this little brush here, okay. Now, what I’m going to do is I’m just going to go around and just tap the top of the soil down. You can see it just cleans it up nicely, any little roots in there start to pop back out and it just kind of doesn’t push the soil down. It’s not firming it down, but it just evens it up, makes it look nice. Nice and even, it just finishes it off.”
“Whoa, look at that”
“Now you can see what I’ve done is I’ve kept the soil just down below the rim of the pot. So we’ve got this little lip here all the way around, and that, I think, just frames the soil nicely, sets it off so we don’t want it right up to the top. The other reason we don’t want it right up to the top is because also when you go to water it, the water can run off the top. This way you can water it now and the soil will fill up to here and it’ll just drain down into the soil, brilliant.”
“Okay, we’ve got this little bit of wire here, remember that? The anchor wire there. What I’m going to do now is I am just going to get, you can use your snips or a pair of pliers is actually better if you’ve got some, and I’m just going to give that a little turn on there.”
“I’ll be careful not to cut through it, that’s nice. That is nice and firm. Can I do the pickup test? Whoa, look at that. All right, that’s good. Now, obviously I don’t want that bit sticking up, so I’m going to just push him down. Be careful not to push it through your finger. I’m just going to I’m going to cover him over a little bit of soil. That’s the other thing nice about these here because you can put the soil in there and then we can just sprinkle a little bit more on top like that. Look at that. Tap tap tap. Beautiful. Turn back round and I’ll stand to one side so you can see. I’ll have a quick look. Yeah, I like that.”
“We mustn’t forget now we’ve got to water our bonsai”
“Like I say, at the moment he looks a little bit thin, but we’ve got new branches going to grow around here, new twigs, leaves. It’s going to look fantastic.”
“All we’ve got left to do now, and that’s really important, we mustn’t forget now we’ve got to water our bonsai because obviously the soil we just added is very dry so we’ve got to give them a good soaking. You can stand him in a bowl of water up to here, and then the water will drain up through and soak into that soil, make it nice and wet, a good 10 / 15 minutes is good. Take it out, let it drain. Oh, when we do that, of course, because it’s an indoor bonsai, we’ve got our drip tray there. Let’s pop them in there, see what he looks like. Yeah, that’s good. Okay, so that will catch any drips as it runs down through.”
“I’ve got a watering can here and I’m going to do some watering with and someone forgot to fill my watering can. Right, just going to go and fill it up, back in a minute. Here we go, filled it up now so we will give our lovely bonsai a nice, good soaking. Oh, I can hear the roots going. “Oh it’s lovely.”
“New leaves in abundance”
“Just work that around, that’s it and I’ll just keep doing this. Gradually the water will come down and will start to run out the holes in the pot. If you’re using a watering can, watering it like this, just keep going till it starts to drain into the tray underneath and then you know that the soil is nice and wet. Let that soak in for a little bit, pop that up there and there we go. Spin him around for you so you can have a look. Okay, very nice.”
“So I hope you’ve enjoyed my little tutorial on how to pot your bonsai. Obviously, this is basics, it does get a lot more involved but you’ve got to start somewhere. Take care.”
“Only ten days later. Look, it’s beautiful, isn’t it? Look at all these lovely green leaves. New shoots in abundance. In fact, needs pruning. Amazing. I do love it. It is fantastic.”
-
 General Purpose Bonsai Soil – Perfect For All BonsaiPrice range: £6.99 through £26.95
 -
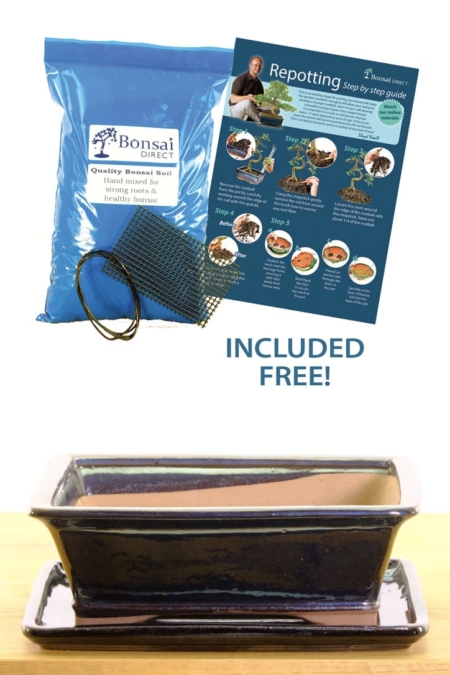
 Bonsai Repotting Kit – Includes Accessories to Repot your Bonsai TreePrice range: £19.99 through £44.94
 -
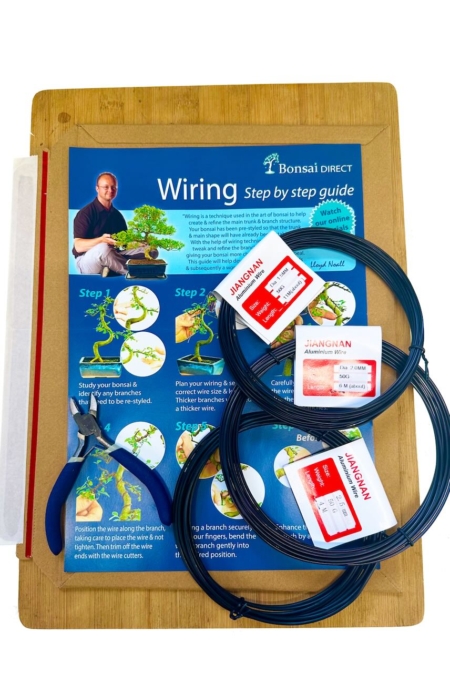
 Bonsai Tree Wiring Kit£23.99
 -
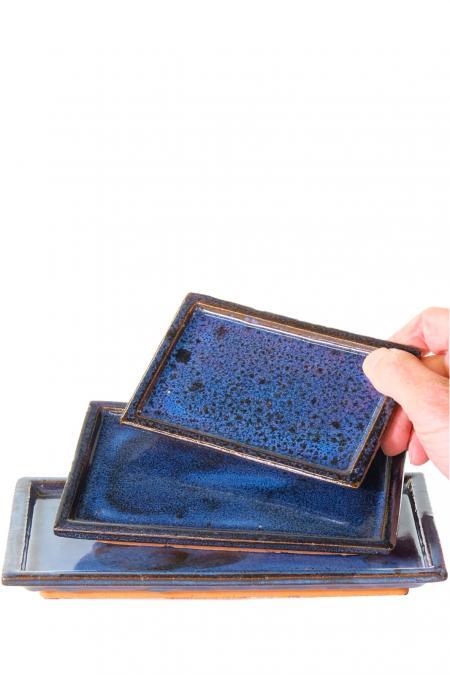
15cm Classic Blue Ceramic Bonsai Pot with Drip Tray£16.99
-
18cm Medium Sized Classic Blue Ceramic Bonsai Pot – Drip Tray Optional ExtraPrice range: £16.99 through £24.98
-
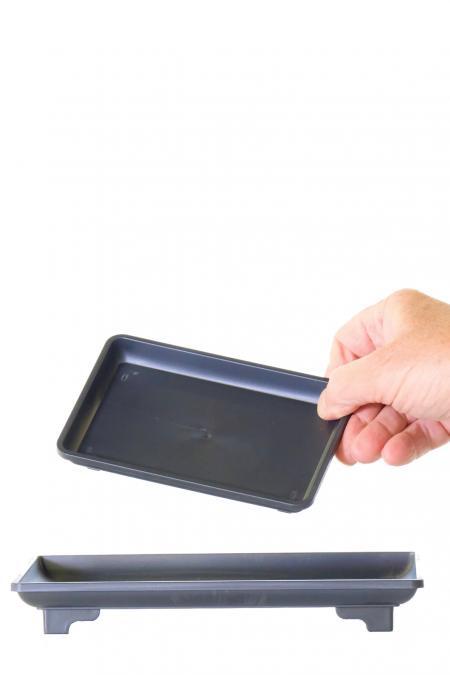
Bonsai Drip/Humidity Tray – 3 sizes availablePrice range: £6.99 through £9.99
-
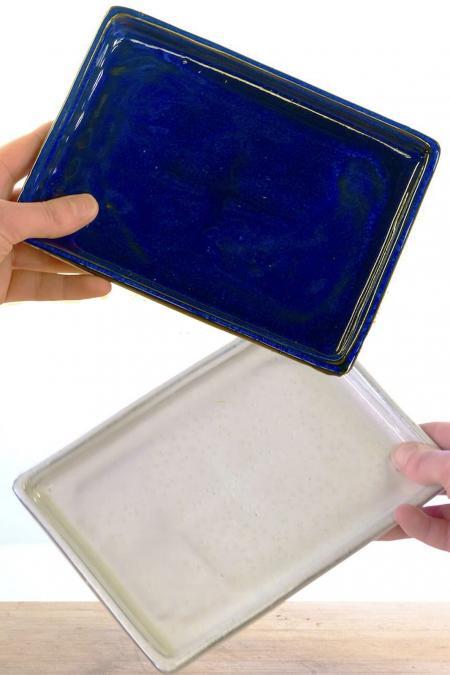
Ceramic Bonsai Drip Tray – Cream or Blue | 21 x 15 cm – Elegant Tray for Bonsai Pots£16.99
-
Ceramic Bonsai Drip Tray/Humidity Tray – Various sizesPrice range: £8.99 through £14.99
-
15cm (6″) Rectangular Glazed Pewter/Black Ceramic Bonsai Pot with Matching Tray£29.99


Please keep in touch!
An eco-friendly bonsai tree from a small, independent UK business who are conscious about their sustainability and are helping to fight the fight for clean air.
If you are unsure about which bonsai tree is best for you, for your gift, or you have any other queries, please contact us and one of our friendly team will get back to you.
Make sure you sign up for our newsletter (at the bottom of the page) for priority access to new products and exclusive offers. You can also find us on Facebook, Instagram, Twitter, TikTok and Pinterest for behind the scenes, tutorials and lots of other care advice!
If the tabs above don’t answer your question, we are here to help.
We regret that we are unable to refund or exchange any bonsai after 7 days of delivery. This is because they are live plants and we find that after this time they have been out of our care for too long.
However, we are always here to help; if you have any questions about your bonsai, please send us some photos. Thank you for your understanding.
| Sales | Aftercare | Address (Office Only) | DPD |
|---|---|---|---|
| Office Hours: 9:00 – 16:00, Monday – Friday Phone: 07860 165086 (Sales Only) Please Note: We do not work weekends or bank holidays | If you have questions about your bonsai, please send us some photos. Email: help@bonsaidirect.co.uk Whatsapp: 07860 165086 Instagram Facebook | Bonsai Direct (Office Only) Upcott Barns, Morchard Bishop Devon EX17 6NG | 99% of orders arrive on the selected date. If you need help with a delivery, please call DPD: 01212 754815 If you have requested Monday delivery, DPD may try to deliver over the weekend to keep on top of parcels. You can control the delivery date once you have received your 1-hour time slot. |